-
320x100
이 글은 Vue.js 중급 강좌 - 웹앱 제작으로 배워보는 Vue.js, ES6, Vuex 강의를 바탕으로 작성한 글입니다.
멋진 강의 감사합니다 (__)
시리즈: Todo 웹앱 만들기(2)
7. UX 업그레이드
이제부터는 꼭 필요한 기능은 아니지만, 있으면 사용자 경험을 개선하는 데 도움을 주는 기능을 개발합니다.
이름 저장하기
저는 서비스의 트렌드 요소 중 하나는 '개인 맞춤'이라고 생각합니다. 로그인 한 사용자에게 맞는 홈 화면을 보여주는 네이버처럼요.
그래서 전 이름을 불러주는 서비스를 좋아합니다. (나에게로 와서 꽃이 되었다... 🌸)
Momentum 서비스와 비슷하게, 처음 만난 사용자에게 이름을 묻고 저장하는 과정을 추가해 보겠습니다.
없던 기능이 추가된 거라 개발이 좀 꼬였는데 실무라 생각하고 진행해 보죠 ヽ(๏∀◕ )ノ 에헤라디야
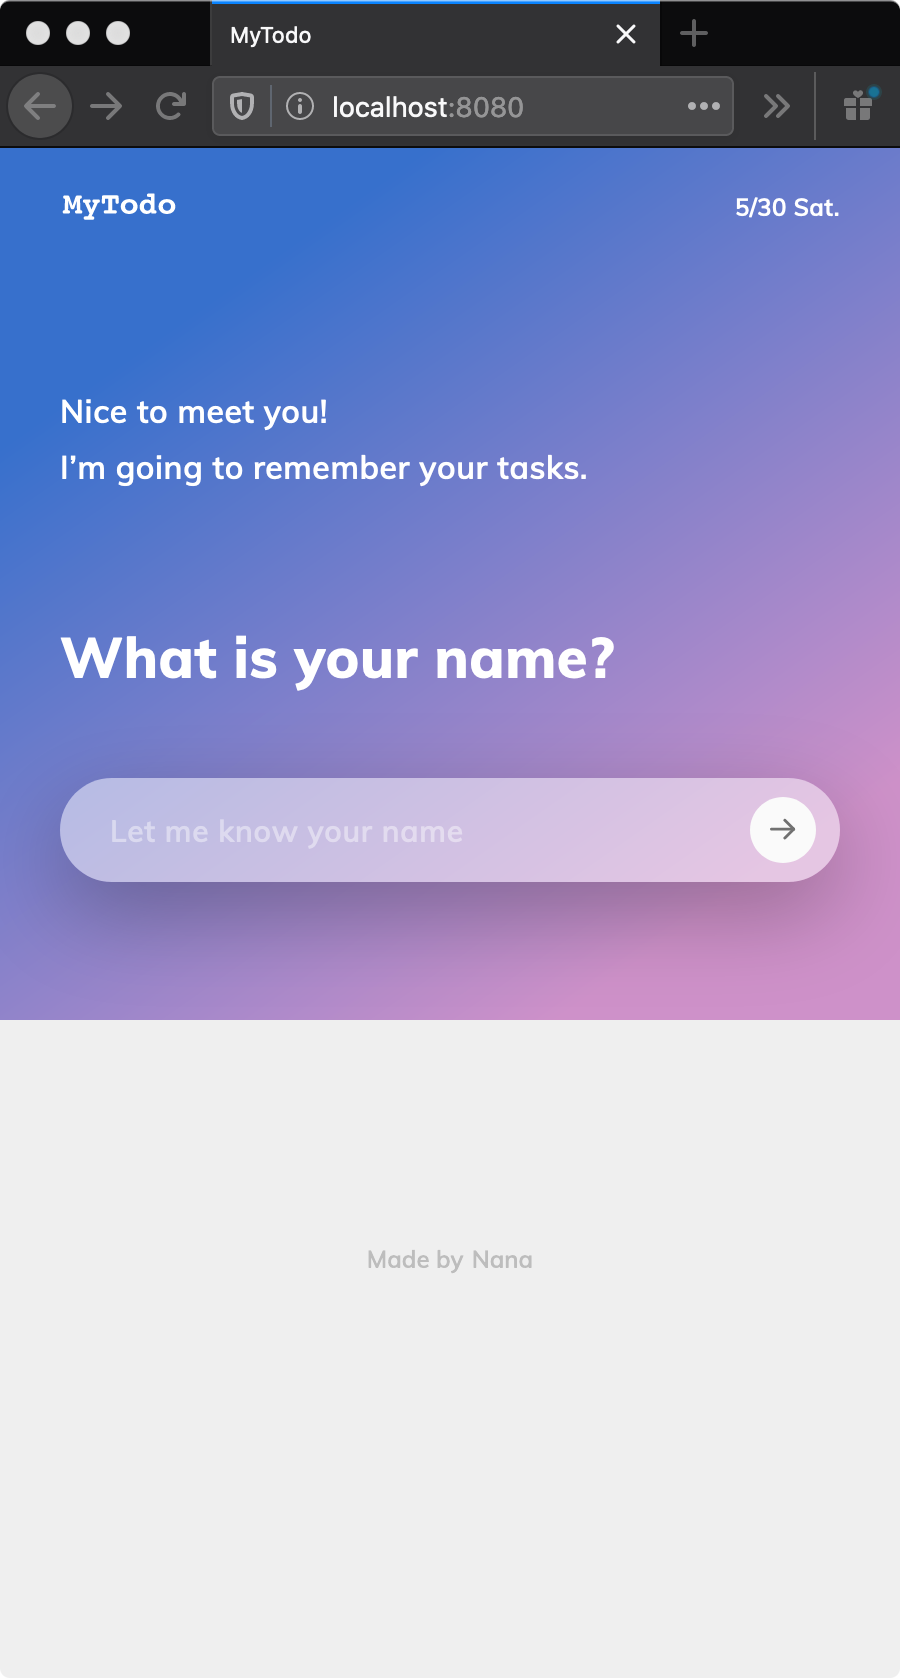
우선 사용자의 이름을 묻는 UI가 필요합니다.
이걸 별도의 페이지로 만들지, 텍스트를 수정하는 걸로 할지, 클래스로 관리할지 고민이 됐습니다.
이 UI는 사용자가 대부분의 경우 한 번만 볼 것이기 때문에, 별도 컴포넌트로 만든 뒤 조건에 따라 보임/숨김 처리를 하기로 했습니다.
v-if디렉티브를 쓰면 조건부 렌더링이 가능합니다. 조건은 userName이라는 값이 있는지를 기준으로 하기로 했습니다.userName을 getItem()으로 가져오되, 그 값이 없다면 null 곧 false이므로 이름을 물어보는 <TodoHello/>가 표시됩니다.
<!-- App.vue -->

<template>
  <div id="app">
    <TodoHeader />
    <div v-if="userName">
      <TodoTitle />
      <TodoInput />
    </div>
    <div v-else>
      <TodoHello />
    </div>
  </div>
</template>

<script>
export default {
  data() {
    return {
      userName: ''
    };
  },
  created() {
  this.userName = localStorage.getItem("userName");

  if (localStorage.length > 0) {
    for (let i = 0; i < localStorage.length; i++) {
      if (localStorage.key(i) !== "userName") {
        this.todoItems.push(
          JSON.parse(localStorage.getItem(localStorage.key(i)))
        );
      }
    }
  }
},
 //...
}
</script>
TodoHello에서는 사용자 이름을 물어봅니다.
<!-- TodoHello.vue -->

<template>
  <div>
    <div class="hello">What is your name?</div>
    <label for="user-name">Name</label>
    <input type="text" id="user-name" v-model="userName" v-on:keyup.enter="addUserName" />
  </div>
</template>

<script>
export default {
  data() {
    return {
      userName: ""
    };
  },
  methods: {
    addUserName() {
      this.$emit("addName", this.userName);
    }
  }
};
</script>
App.vue는 이렇게 올라온 값을 userName에 넣고, prop으로 다시 내려줍니다.
TodoTitle.vue가 여러 개의 prop을 받기 때문에 기존의
propsdata에서propCount와propName으로 이름을 바꿨습니다.<!-- App.vue --> <template> <div id="app"> <div v-if="userName"> <TodoHeader /> <TodoTitle v-bind:propCount="checkCount" v-bind:propName="userName" /> <TodoInput v-on:addItem="addOneItem" /> </div> <div v-else> <TodoHello v-on:addName="addUserName" /> </div> </div> </template> <script> //... export default { data() { return { todoItems: [], userName: "" }; }, methods: { addUserName(userName) { localStorage.setItem("userName", userName); this.userName = userName; }, //... }, //... }; </script>이름 수정하기
간단한 기능인데도 헤맨 부분이네요@_@
이름 부분은 일반
<span>태그로 표시하되,contenteditable속성으로 편집 가능하게 처리했습니다.CSS 스타일링을 통해 사용자가 현재 입력 중임을 알 수 있도록 했고요.
엔터키를 누르거나 포커싱이 없어지면 바로 $emit을 통해 데이터를 전달하게 했습니다.

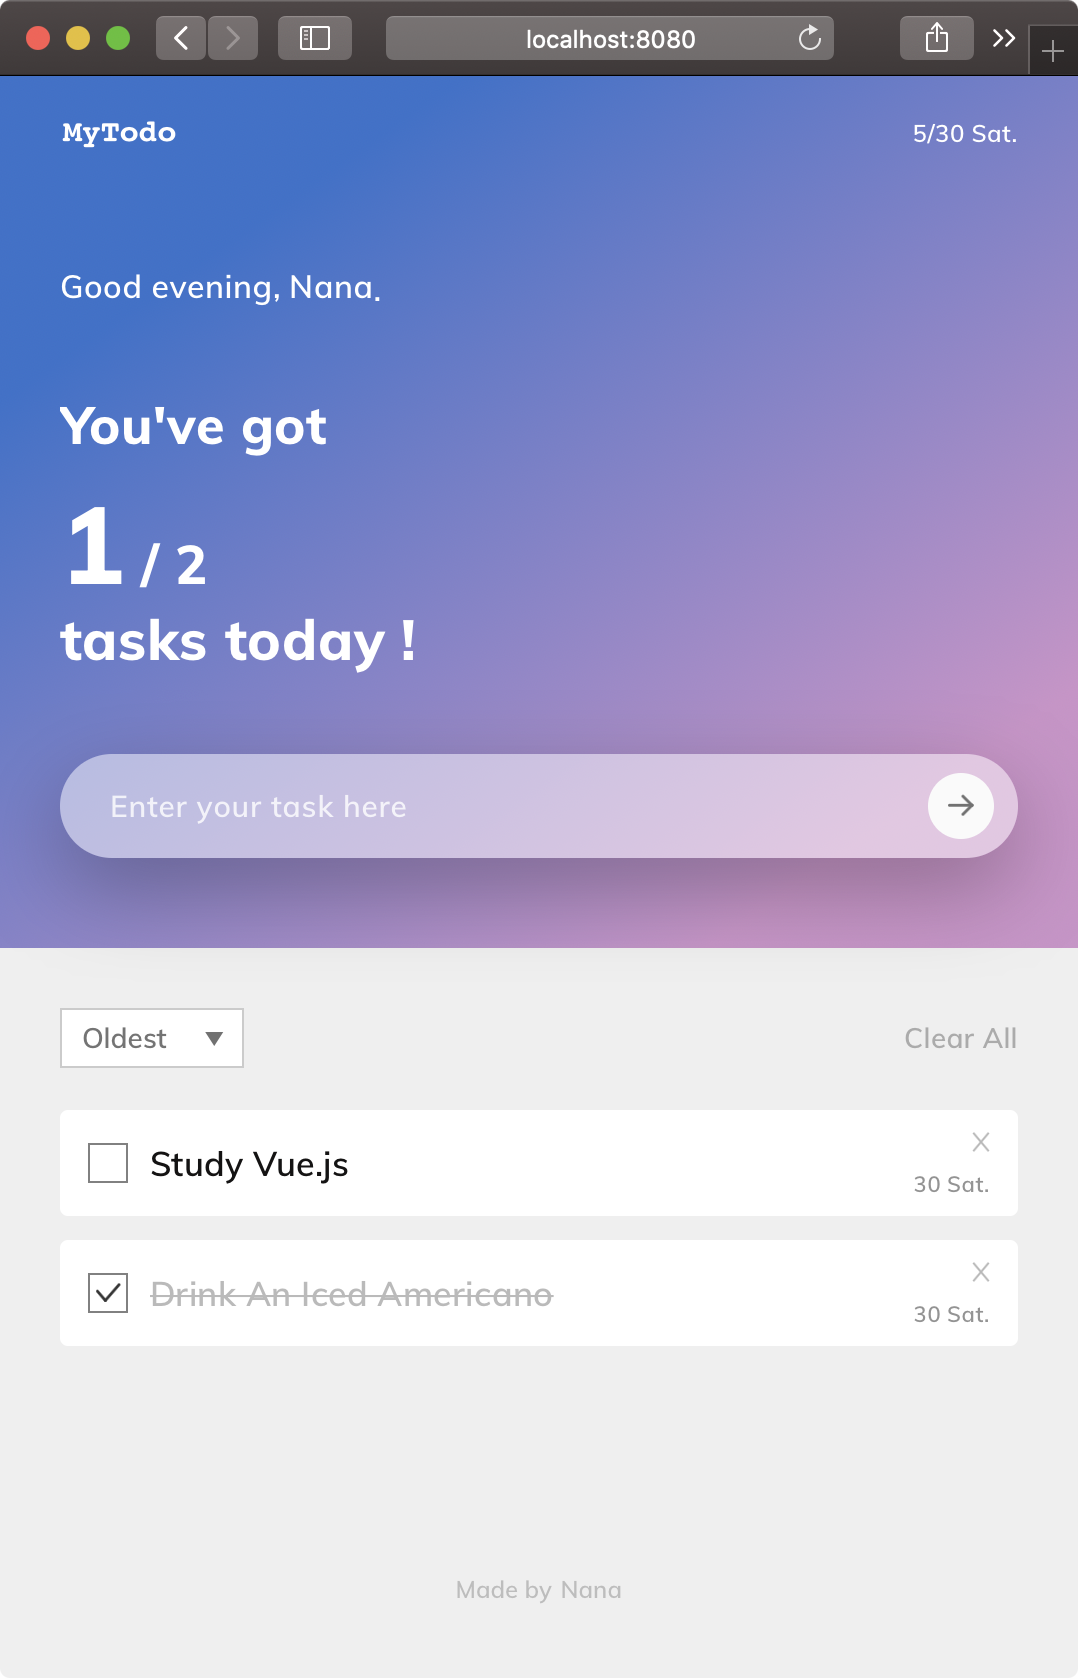
<!-- TodoTitle.vue -->

<template>
  <div class="title">
    <p class="title__text">
      <span class="title__message">{{ message }},</span>
      <span
        v-on:keyup.enter="handleName"
        v-on:blur="handleBlur"
        class="title__name"
        ref="test"
        contenteditable="true"
      >{{ propName }}</span>
    </p>
    <!-- ... -->
  </div>
</template>

<script>
export default {
  props: ["propCount", "propName"],
  data() {
    return {
      message: "Good morning"
    };
  },
  methods: {
    handleBlur(e) {
      const originalName = this.propName;
      const newName = e.target.innerText;
      if (newName !== originalName) {
        if (newName === "") {
          e.target.innerText = originalName;
        } else {
          this.$emit("changeName", newName);
        }
      }
    },
    handleName() {
      this.$refs.test.blur();
    }
  }
};
</script>
시간대에 따른 인사말 보여주기
아침/점심/저녁에 따라 다른 인사를 합니다.
공통함수인
getDate()에 시간대를 구하는 코드를 추가했어요.<!-- getDate.js --> export default () => { const now = new Date(); //.... const hour = now.getHours(); let daytime = ""; if (hour < 12) { daytime = 'morning'; } else if (hour < 18) { daytime = 'afternoon'; } else { daytime = 'evening'; } const dateInfo = { month, date, week, time, daytime } return dateInfo }<!-- TodoTitle.vue --> <script> import getDate from "../assets/commonJS/getDate.js"; export default { props: ["propCount", "propName"], data() { return { message: "" }; }, methods: { //... mounted() { this.message = getDate().daytime; } }; </script>빈 화면일 때 처리
이번에는 빈 화면일 때
list--empty라는 클래스가 붙도록 설정합니다.로컬 스토리지는 userName이 들어있기 때문에, todoItems.length가 0 이하일 때를 체크하도록 했습니다.
<!-- App.vue -->

<template>
  <div id="app">
      <TodoList
        v-bind:propEmpty="isEmpty"
      />
  </div>
</template>


<script>
export default {
  data() {
    return {
      todoItems: [],
      userName: ""
    };
  },
  computed: {
    isEmpty() {
      return this.todoItems.length <= 0 ? true : false;
    }
    //...
  },
  //...
};
</script>
<!-- TodoList.vue --> <template> <ul class="list" v-bind:class="listempty"> <!-- ... --> </ul> </template> <script> export default { computed: { listempty() { return this.propEmpty ? "list--empty" : null; } }, props: ["propItems", "propEmpty"], //... }; </script>그나저나 이름 짓는 게 진짜... 어렵네요...... ໒( •́ ∧ •̀ )
모달 창 띄우기
common 폴더에 잠들어 있던 Modal.vue를 써먹을 시간입니다!
모달은 크게 타이틀+텍스트+닫기 버튼으로 이루어져 있습니다. 타이틀과 텍스트는 각 상황 별로 다른 문구를 출력하게 만들 거에요.
이때
slot이라는 걸 유용하게 사용할 수 있습니다. 이는 컴포넌트의 재사용성을 높여줍니다. (공식 문서 링크)여기서는
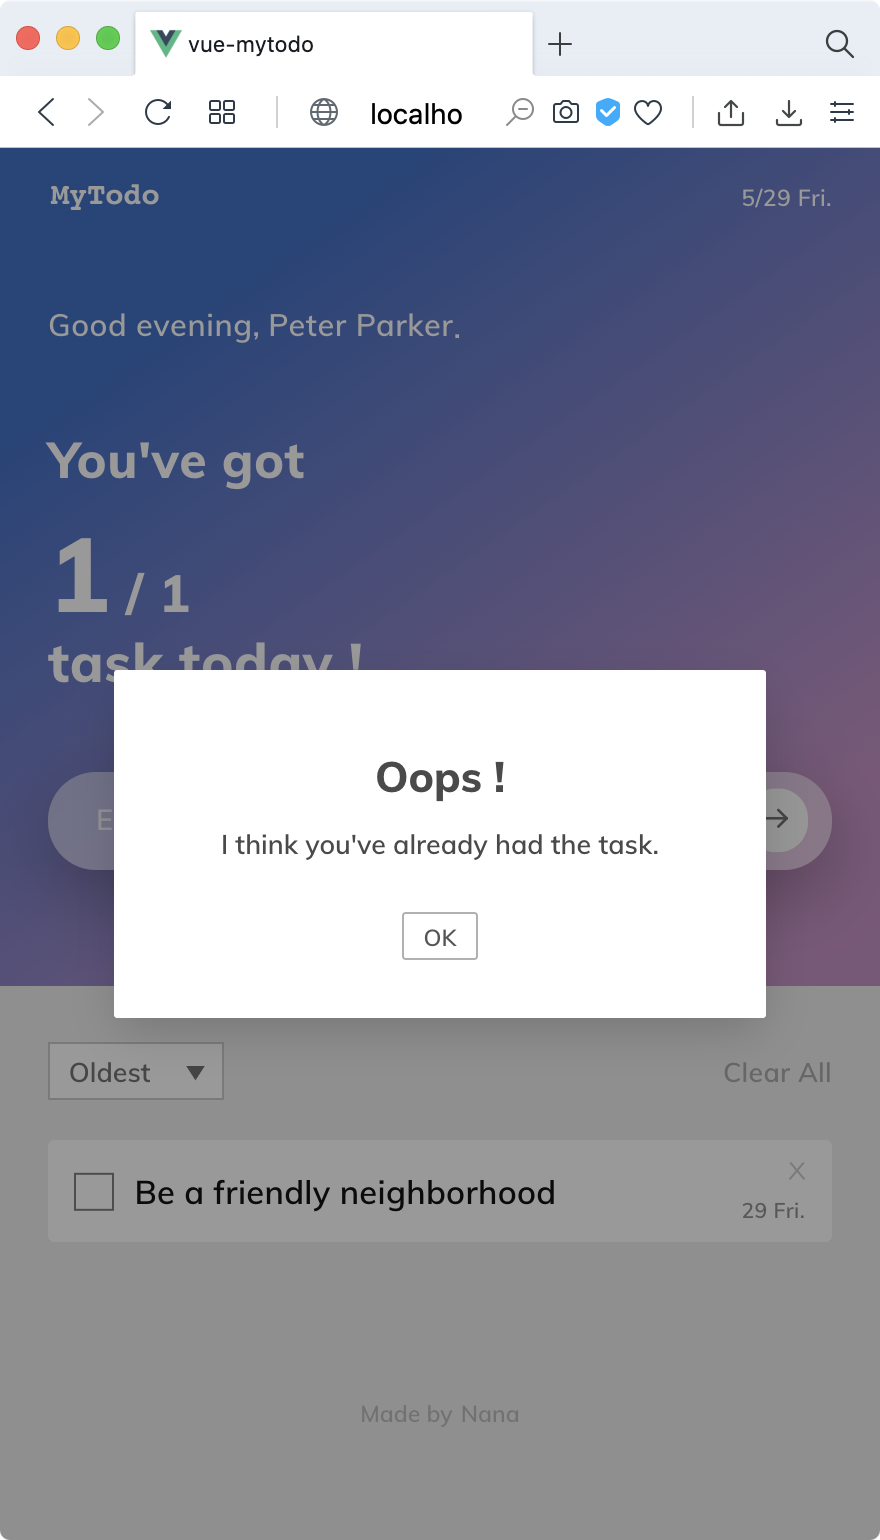
v-slot으로 모달에 텍스트를 넣었습니다.<!-- Modal.vue --> <template> <div class="modal"> <slot name="modal-text">(여기에 모달 내용이 들어가요)</slot> </div> </template><!-- App.vue --> <template> <div id="app"> <Modal> <template v-slot:modal-text>중복되는 할 일이 있어요!</template> </Modal> </div> </template> <script> import Modal from "./components/common/Modal"; export default { components: { Modal } } </script>showModal 값으로 모달이 나타나고 숨겨지도록 합니다.
모달은 사용자 이름을 묻는 <TodoHello/>보다 자주 토글될 것으로 생각되어
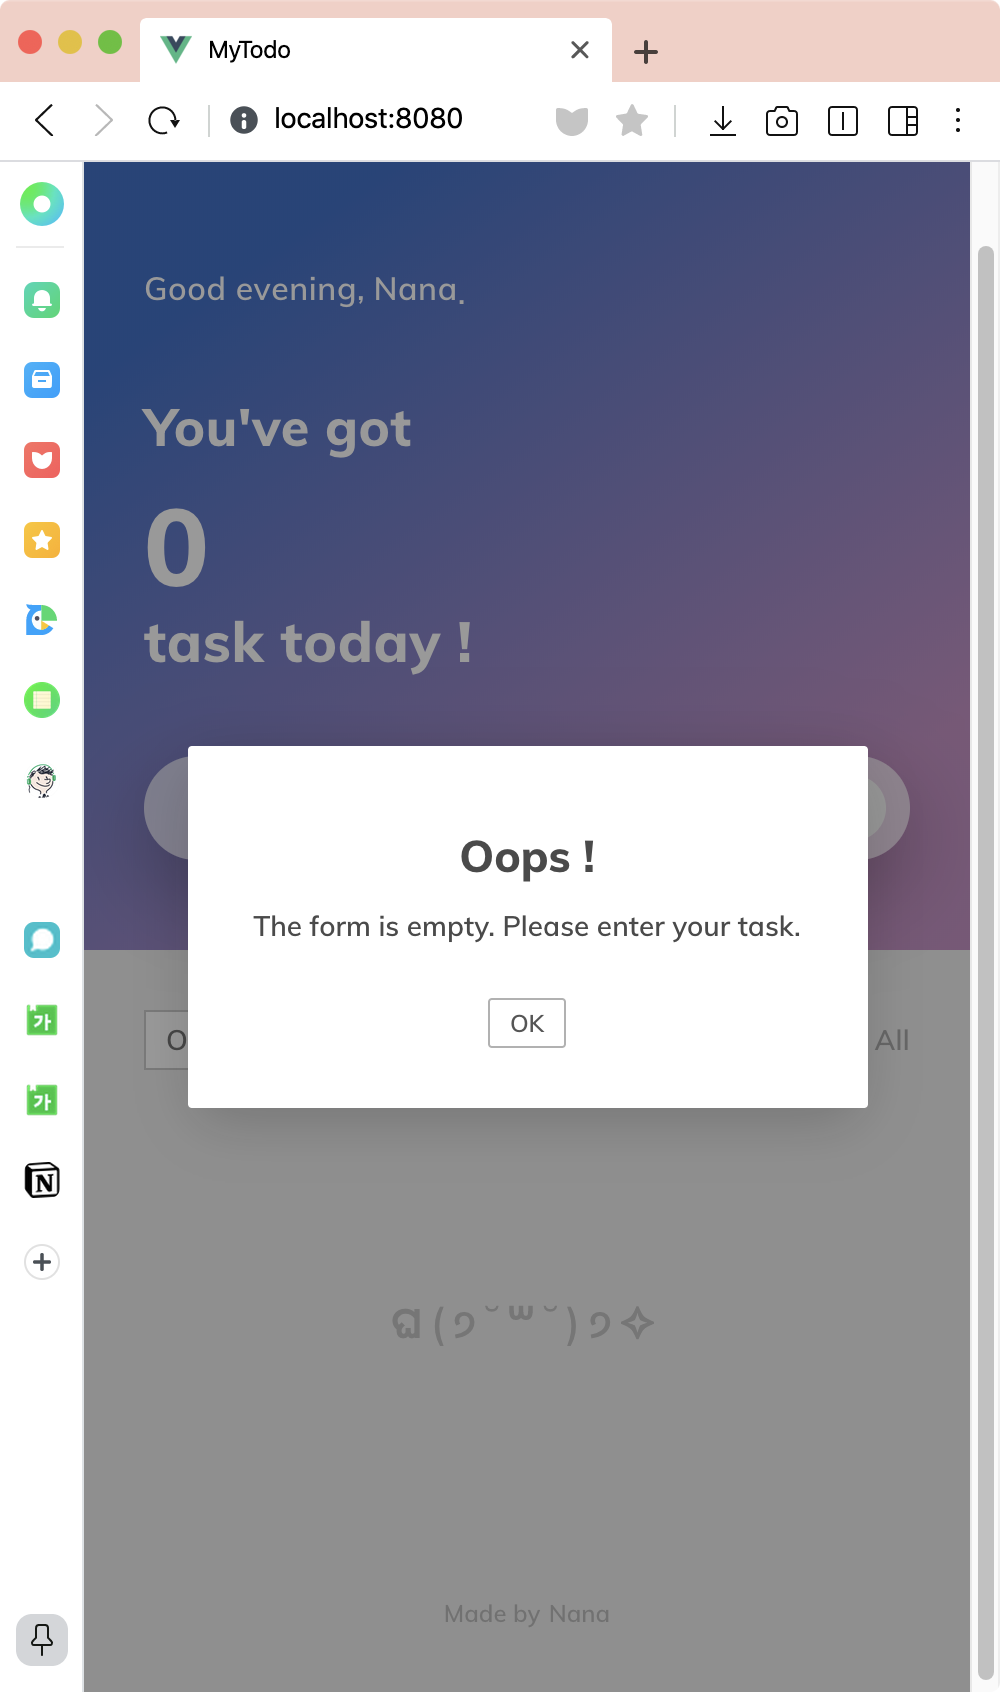
v-show디렉티브를 사용했습니다.<!-- App.vue --> <template> <div id="app"> <Modal v-show="showModal" v-on:close="showModal = false"> <template v-slot:modal-text>{{ modalText }}</template> </Modal> </div> </template> <script> import Modal from "./components/common/Modal"; export default { data() { return { showModal: false, modalText: "" }; }, methods: { addOneItem(todoItem) { // 빈 내용인 경우 if (todoItem === "") { this.showModal = !this.showModal; this.modalText = "The form is empty. Please enter your task."; return false; } // 중복되는 내용인 경우 for (let i = 0; i < this.todoItems.length; i++) { if (this.todoItems[i].item === todoItem) { this.showModal = !this.showModal; this.modalText = "I think you've already had the task."; return false; } } // 저장할 정보 var value = { item: todoItem, date: `${getDate().date} ${getDate().week}`, time: getDate().time, completed: false }; localStorage.setItem(todoItem, JSON.stringify(value)); this.todoItems.push(value); }, //... }, components: { Modal } } </script>확인 버튼, 검은 배경 부분을 클릭했을 때 모달이 닫히도록 설정합니다.
<!-- Modal.vue -->

<template>
    <div class="modal modal__dim" v-on:click.self="$emit('close')">
      <div class="modal__content">
        <p class="modal__text">
          <slot name="modal-text">(여기에 모달 내용이 들어가요)</slot>
        </p>
        <button class="modal__close" v-on:click="$emit('close')">OK</button>
      </div>
    </div>
</template>
추가로 한글 입력 시 메서드가 두 번 실행되는 문제가 있었는데, 아래처럼
keypress.enter로 수정해 해결했습니다.<!-- TodoInput.vue --> <template> <div class="add"> <input type="text" class="add__input" placeholder="Enter your task here" v-model="newTodoItem" v-on:keypress.enter="addTodoItem" /> </div> </template>이제 모달도 잘 뜹니다 ;)
트랜지션 추가
vue의 장점 중 하나는 멋진 트랜지션을 제공한다는 점입니다.
v-enter나v-leave등의 클래스에 트랜지션 내용을 적어두면 때에 맞춰 실행됩니다.이들 클래스에는 트랜지션의 이름이 접두어로 붙습니다. 예를 들어 트랜지션 이름이 hello라면 클래스 이름은
hello-enter나hello-leave가 됩니다.모달이 바로 뿅하고 나타나는 대신 트랜지션을 추가해 보겠습니다.
배경이 서서히 검은 색으로 바뀌고 창은 아래에서 위로 스윽 올라오도록 클래스를 만듭니다.
노드의 초기 렌더에 트랜지션을 적용하고 싶다면
appear속성을 추가 할 수 있습니다.<template> <transition name="modal" appear> <div class="modal modal__dim" v-on:click.self="$emit('close')"> <div class="modal__content"> <p class="modal__text"> <slot name="modal-text">(여기에 모달 내용이 들어가요)</slot> </p> <button class="modal__close" v-on:click="$emit('close')">OK</button> </div> </div> </transition> </template> <style lang="scss"> .modal-enter { opacity: 0; .modal__content { transform: translateY(30px); transition: transform 0.6s; } } .modal-enter-active { transition: opacity 0.3s; } .modal-leave-active { transition: opacity 0.3s 0.05s; } .modal-leave-to { opacity: 0; .modal__content { transform: translateY(30px); transition: transform 0.6s; } } </style>이 트랜지션을 사용하면 꽤 복잡한 응용이 가능해 보입니다.
좀 더 깊게 연구해봐도 좋을 것 같아요 🙋♀️
이번에는 할 일 목록 차례입니다.
할 일 목록을 입력하면 왼쪽 화면에서 스르르 나타나고, 삭제하면 오른쪽 화면으로 스르르 사라지게 해봅니다.
이때 이 리스트는 한 번에 하나만 렌더링 되지 않고 여러 개가 동시에 렌더링될 수 있습니다.
이 경우에는
<transition-group>컴포넌트를 사용합니다.<transition-group name="list" tag="p"> <span v-for="item in items" v-bind:key="item" class="list-item"> {{ item }} </span> </transition-group><!-- TodoList.vue --> <template> <transition-group name="list" tag="ul" class="list" v-bind:class="listempty"> <li class="list__item" v-for="(todoItem, index) in propItems" v-bind:key="todoItem.item"> <!-- ... --> </li> </transition-group> </template> <style lang="scss"> // ==== 트랜지션 .list-enter { opacity: 0; transform: translateX(-30px); } .list-enter-active, .list-leave-active { transition: transform 0.5s, opacity 0.5s; } .list-leave-to { opacity: 0; transform: translateX(30px); } </style>
8. 완성!
드디어 구현 완료! 👏👏👏
다른 브라우저에서도 예쁘게 잘 나와요 :D
 728x90
'Blog > Library' 카테고리의 다른 글
[ReactJS] 1. 시작하기 (7) 2022.02.01 [Vue/Vuex] 뷰 실습 - Todo 웹앱 만들기 (4) (2) 2020.06.03 [Vue/Vuex] 뷰 실습 - Todo 웹앱 만들기 (2) (1) 2020.05.28 [Vue/Vuex] 뷰 실습 - Todo 웹앱 만들기 (1) (5) 2020.05.26 [Vue] 기초 스터디 (2) 2020.05.21 댓글
nana_log
좋아하는 걸 좋아하는 나나 🤟